
How to Set Up a Podcast - Rockville University Ep. 1
Posted by Darro Chea on 16th Jul 2018
Introducing the Rockville University Webcast Series!
In this first episode of Rockville University, we are talking about Podcasting and how to properly set up a recording rig for podcasts. Whether you’re a seasoned pro or a bedroom startup, this first installment of Rockville University should shed some light on how to record a podcast.
Signal Flow? WTH IS THAT? (A quick lesson)
Most people don’t need to understand audio too much to start recording a podcast, but knowing some of the basics can really help you decide on what gear to get. Basically, you need a device to capture sound, a device to record/send that signal to your computer, and a way to hear it back. You’ll need:

To record you voice. (duh) That being said, you can choose between either a dynamic or condenser microphone. (More on that in a minute). It's also highly advisable to have a Pop Filter as well, to help eliminate any "plosives" in your recording, those sound *PUH-retty* bad. You'll also need a microphone stand or boom arm to hold the microphone. Check out the DMS40 if you want something easy, solid and flexible to mount to your desk.
Audio Interface or USB Mixer
This is what amplifies the microphone and connects the signal to your computer. The Interface/Mixer takes the microphone signal, turns it into a digital signal and transmits it to your computer. These can connect to your computer via USB, Firewire, Thunderbolt, etc.
USB Microphone
If you have a USB microphone, then you can essentially skip the audio interface, because it would automatically connect to your computer, but you sacrifice a little bit of quality in the recording that way, and of course you’ll only have one microphone, so you’d be flying solo.
Computer/Laptop

You’ll need a software to record and edit audio called a Digital Audio Workstation (DAW). GarageBand is free with Macs and Audacity is free to download. Using the software can be pretty simple for those who are tech-savy,
however, there is a steep learning curve when it comes to audio editing and mixing. There will be more RU episodes about this in the future, but for now, let's keep it simple.
I recommend using a really good pair of headphones during the recording process to minimize any bleed or feedback loop. (That’s when the sound coming out of the speakers gets back into the microphone...you don’t want that!) It also helps you hear very clearly what is going on in your microphones.
HOW TO GET STARTED!
Connect your Interface/Mixer to your Computer
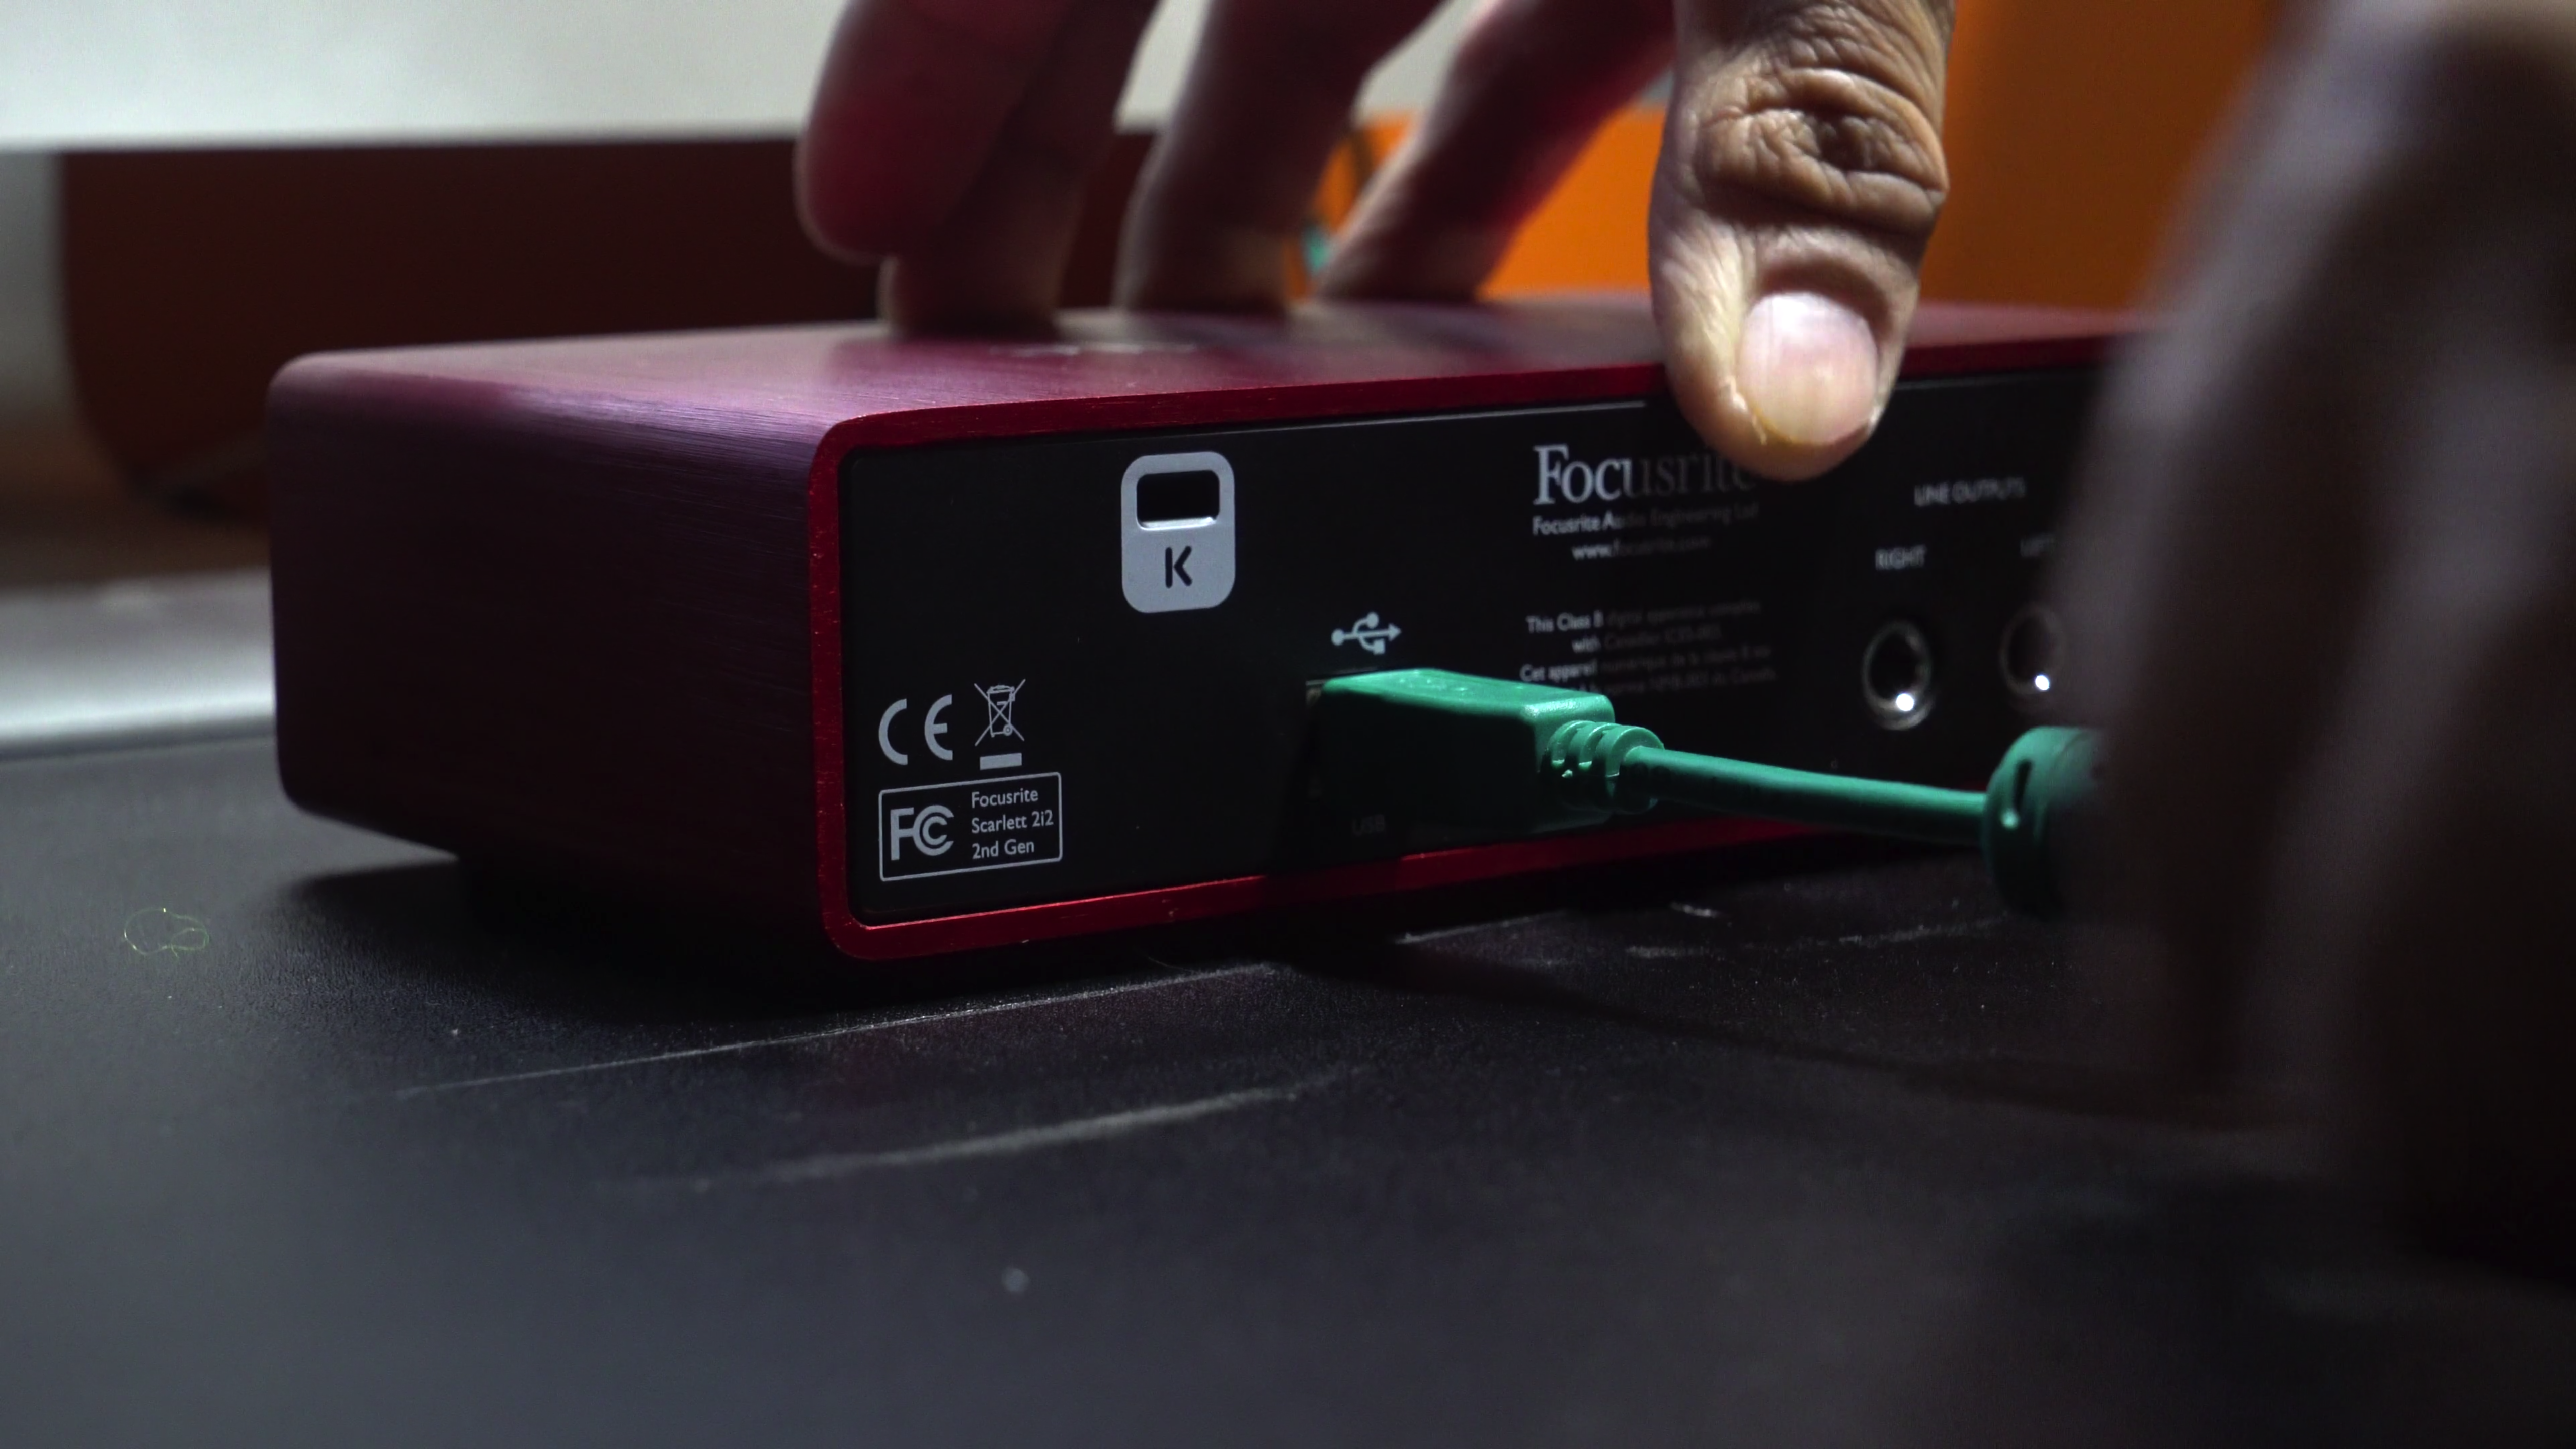
The most common connection is via USB. An interface or mixer will require some sort of power, many times it is provided from your computer via the USB cable, but if not, there should be a designated power supply.
Phantom Power?!
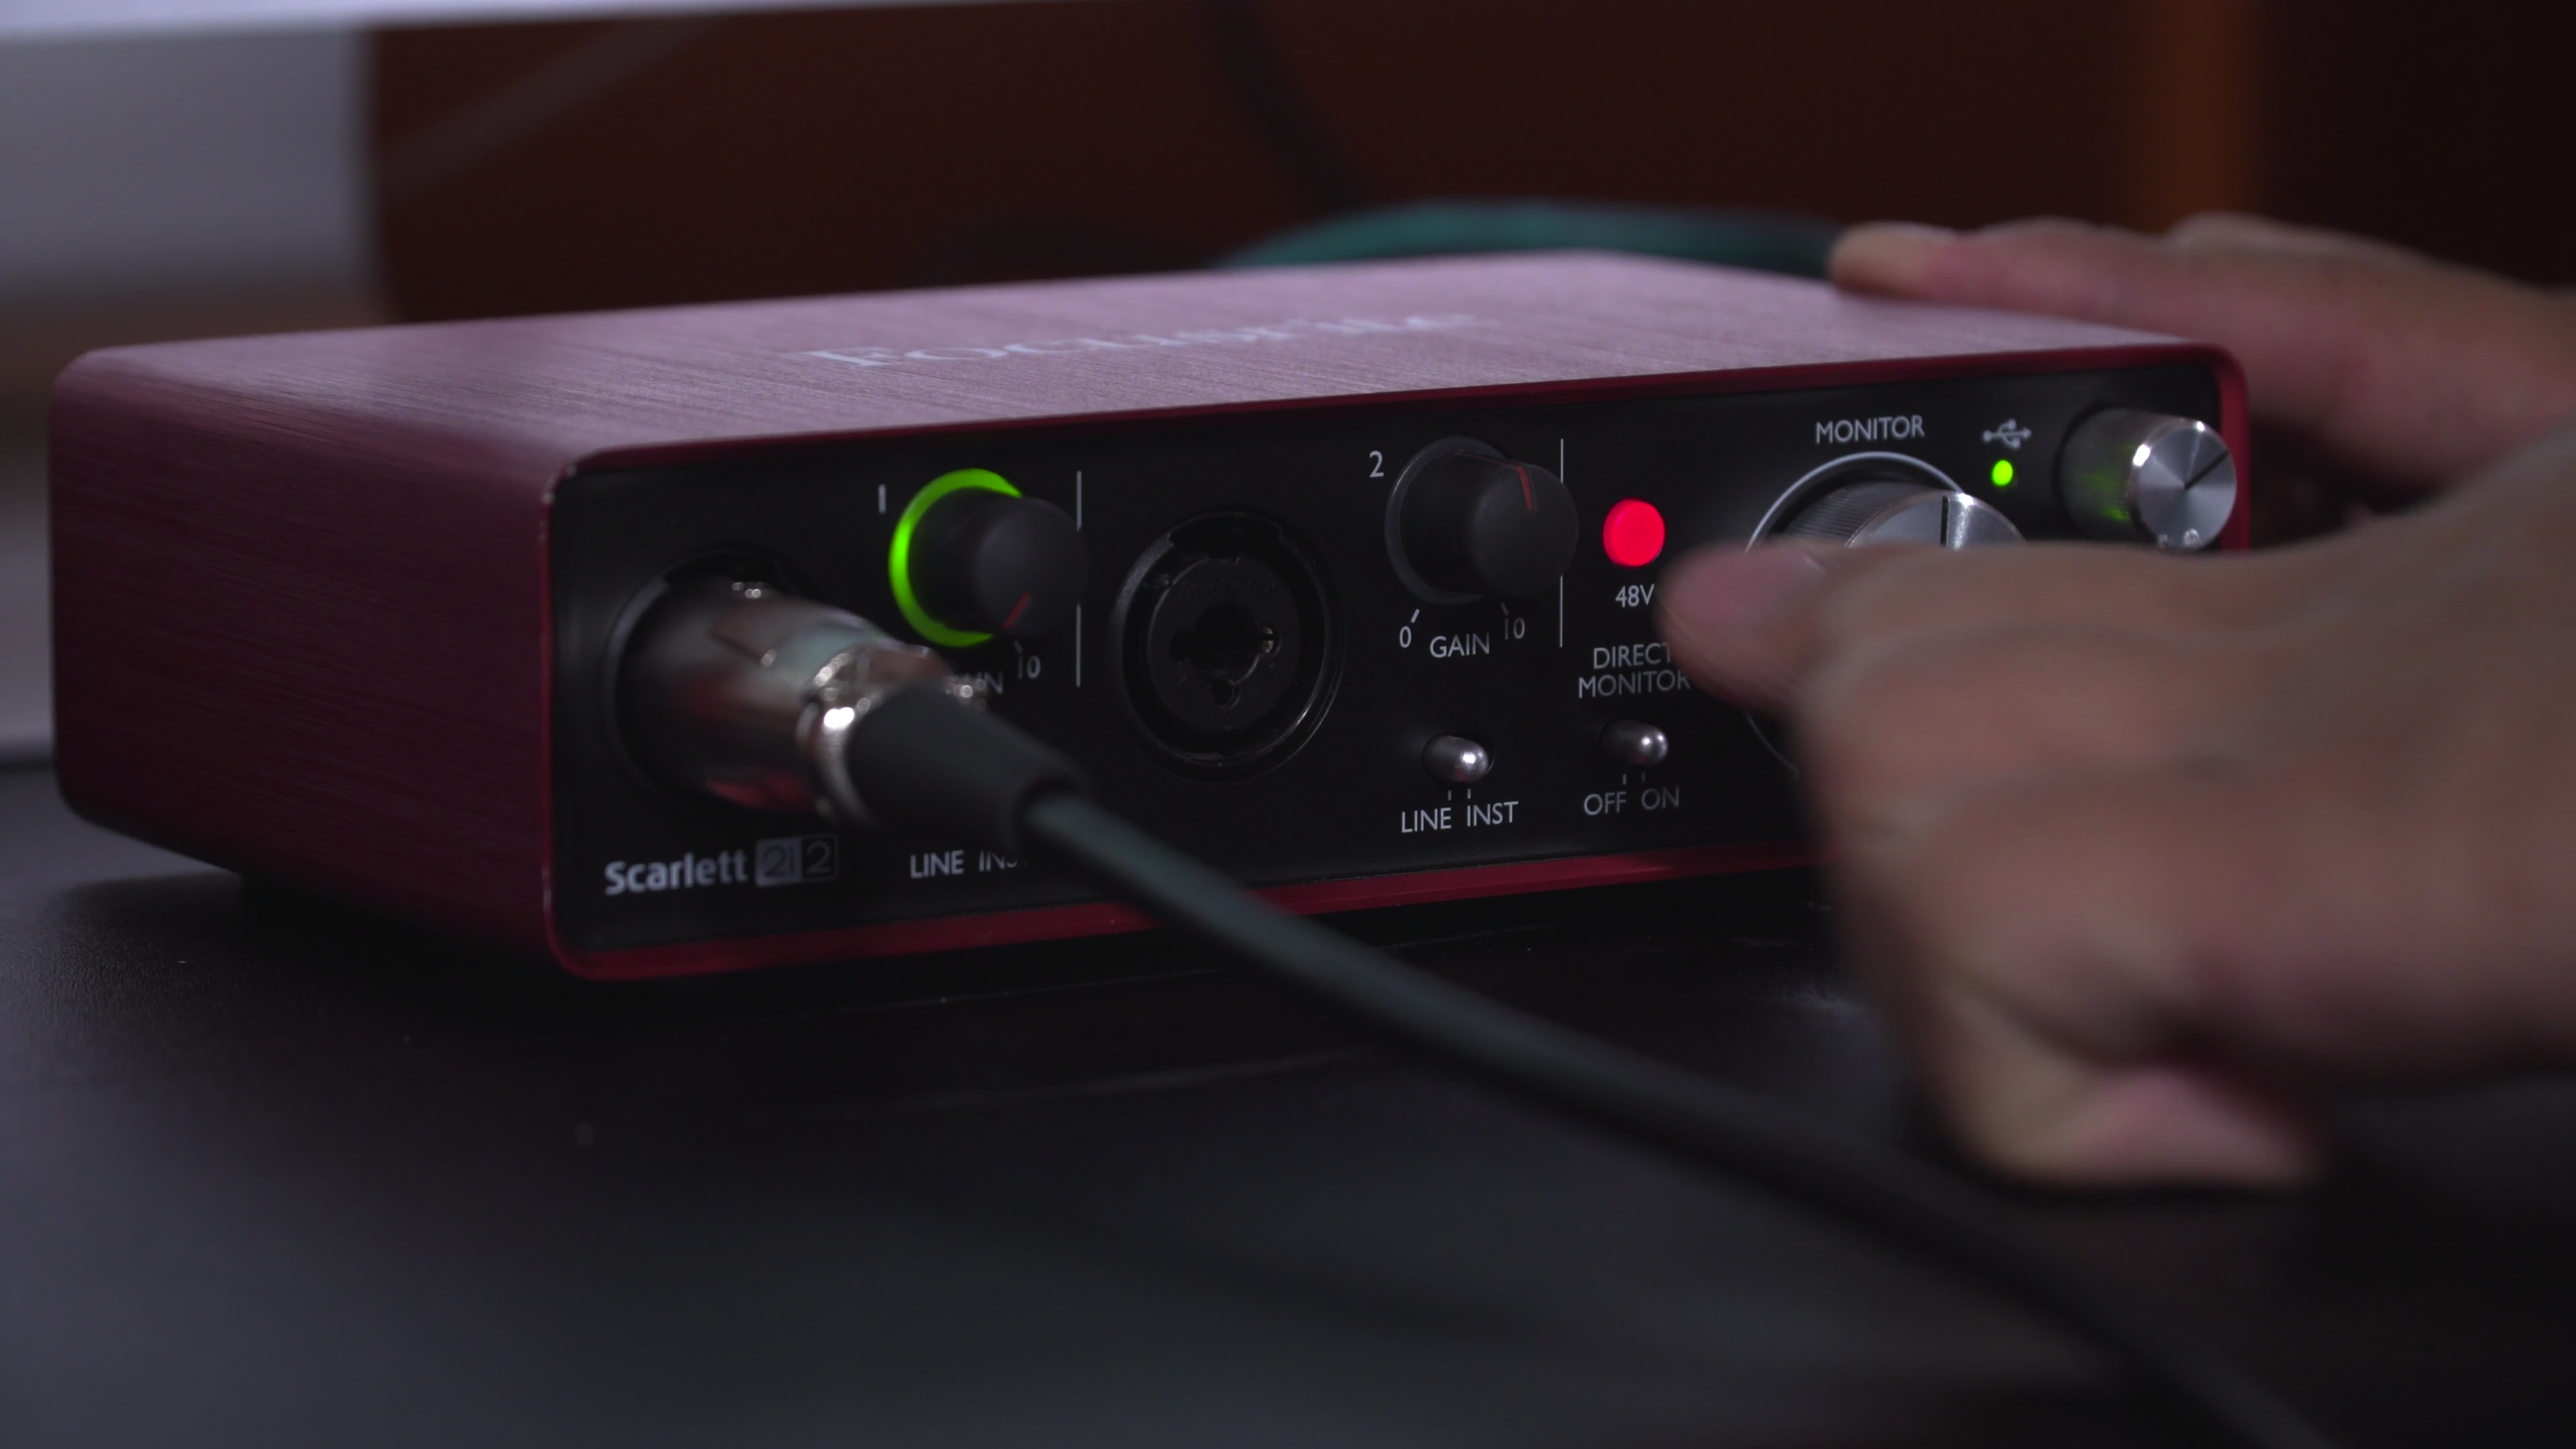 Condenser microphones require 48v of phantom to work. More information about condenser microphones is listed below!
GAINS
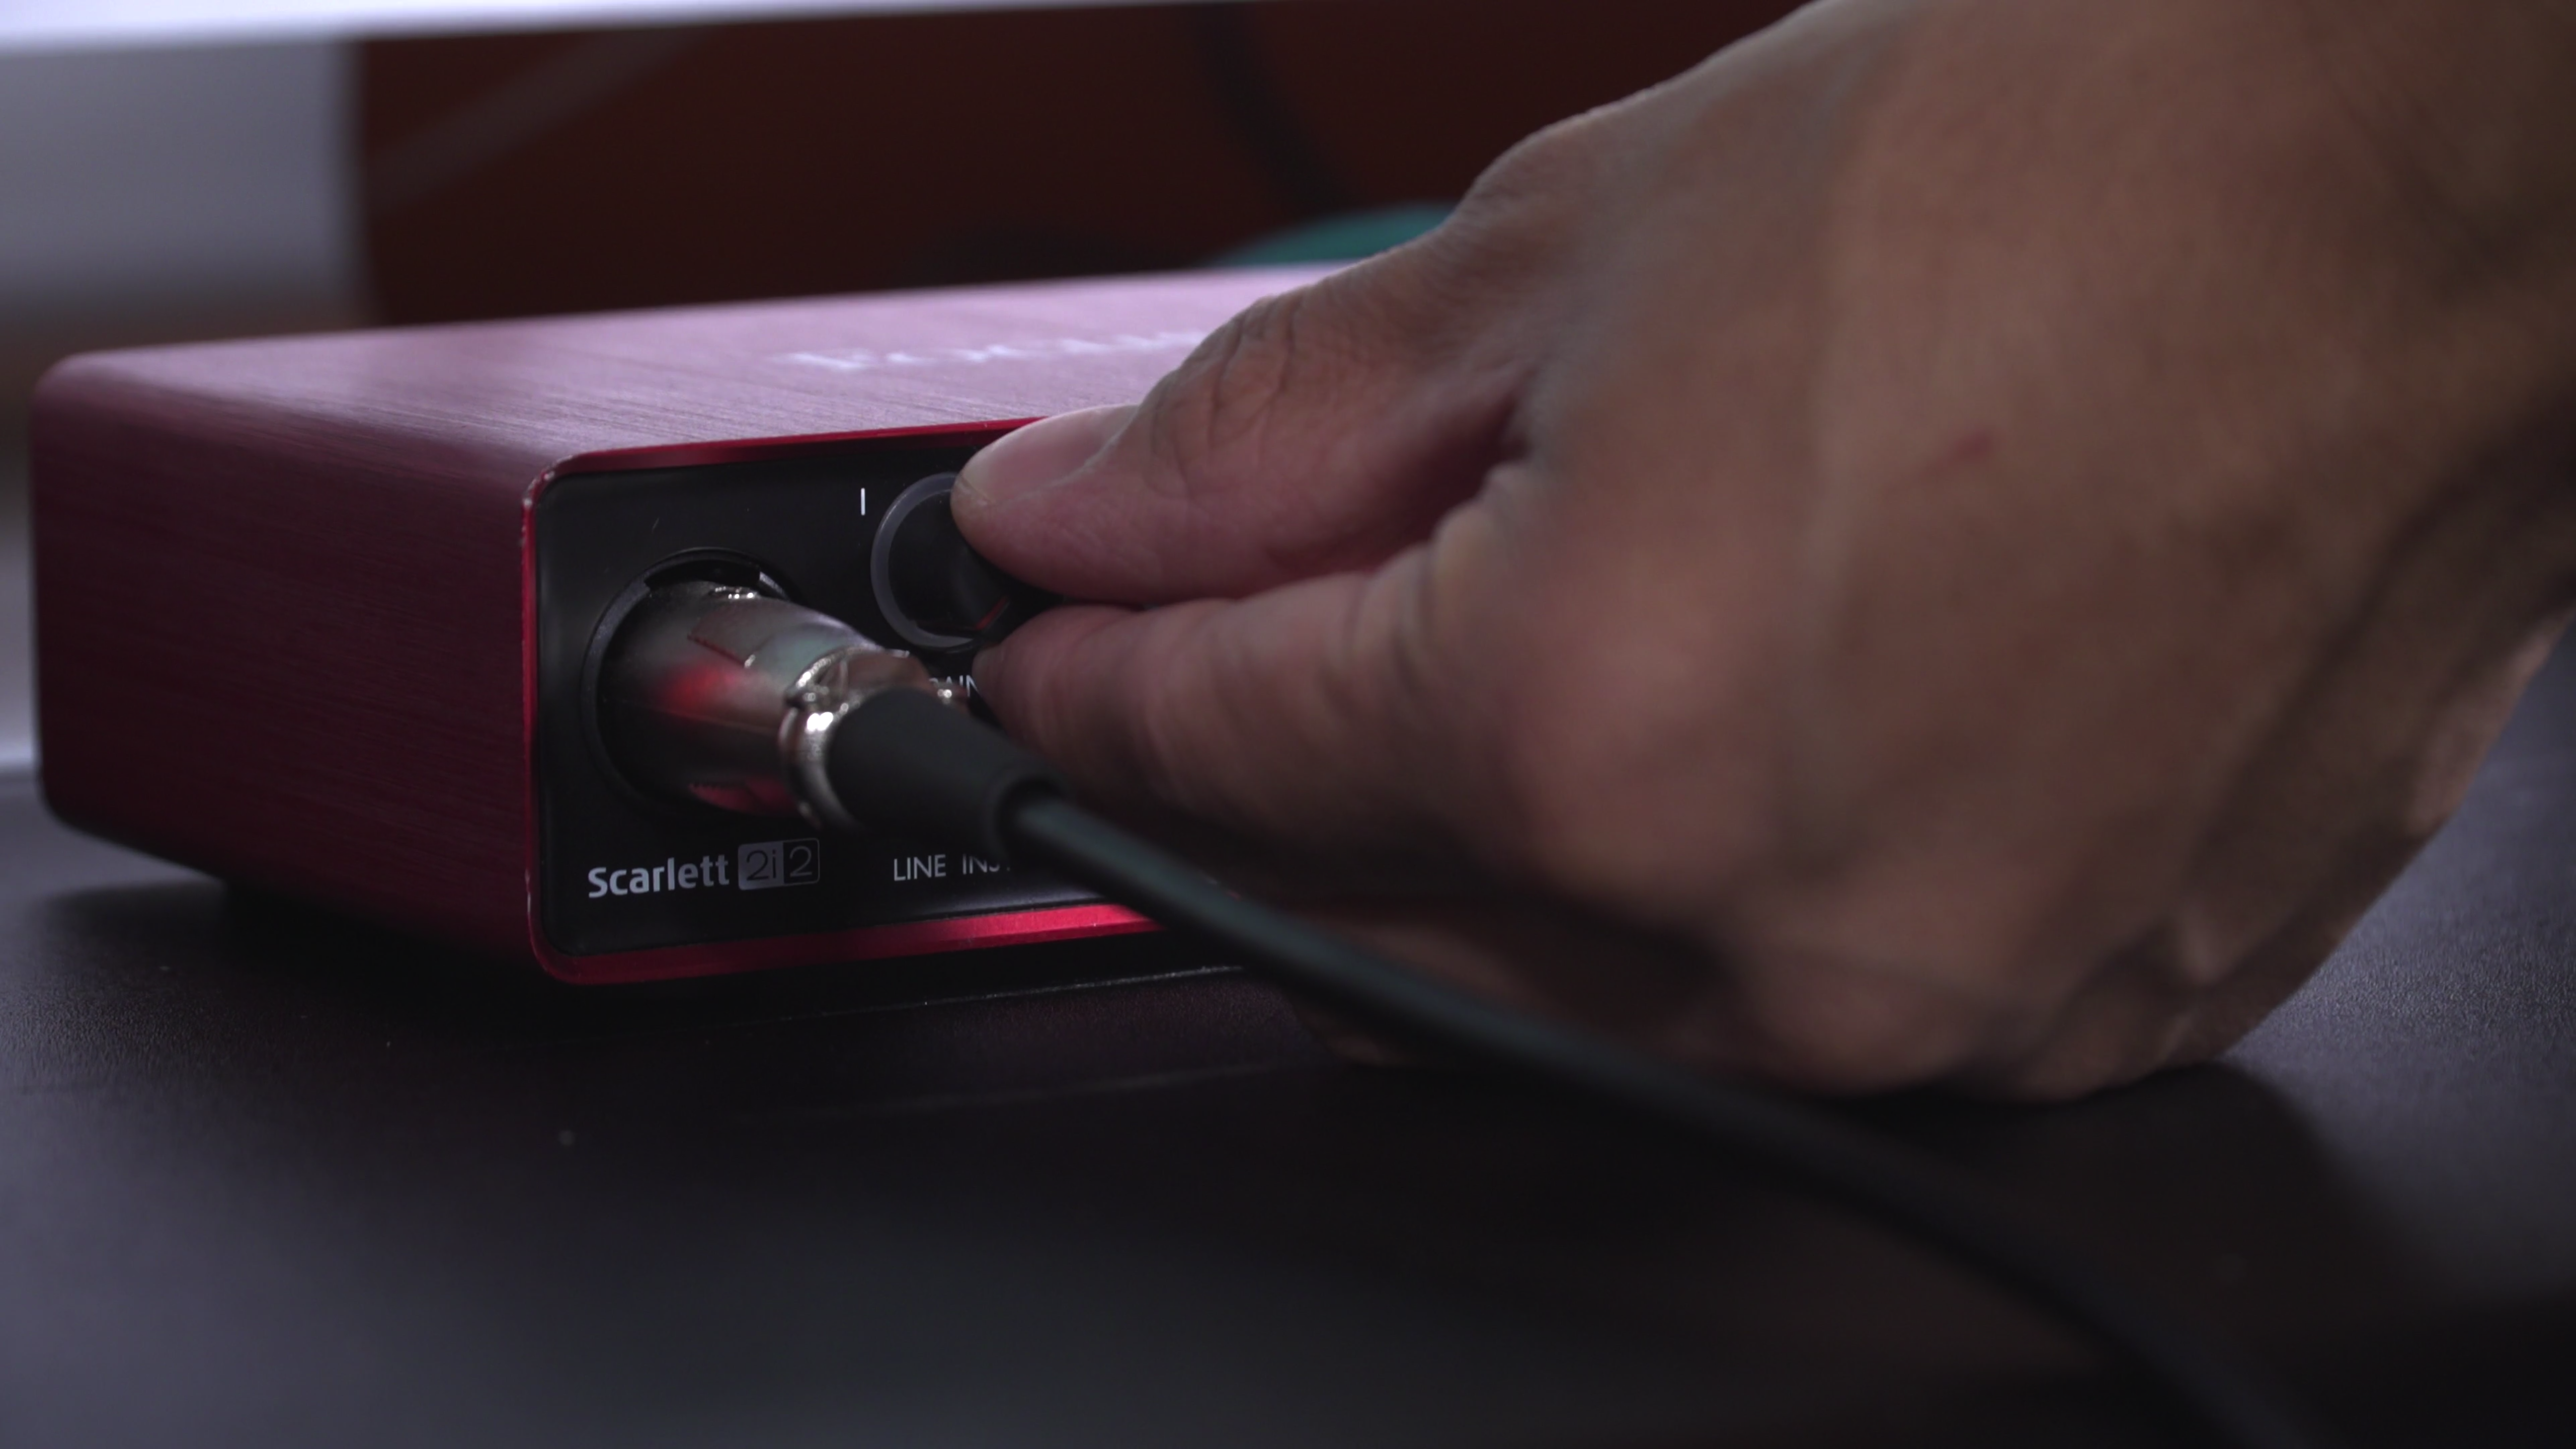
Adjust the “Gain” or “Level” knob of the microphone on the interface/mixer. When you speak into the microphone, there should be some sort of gauge of how much level you’re getting. Don’t let it clip! If the microphone level is too loud, it will start to distort, this is usually indicated by a red light when the microphone receives too loud of a signal.
Select Your Audio Device in your DAW
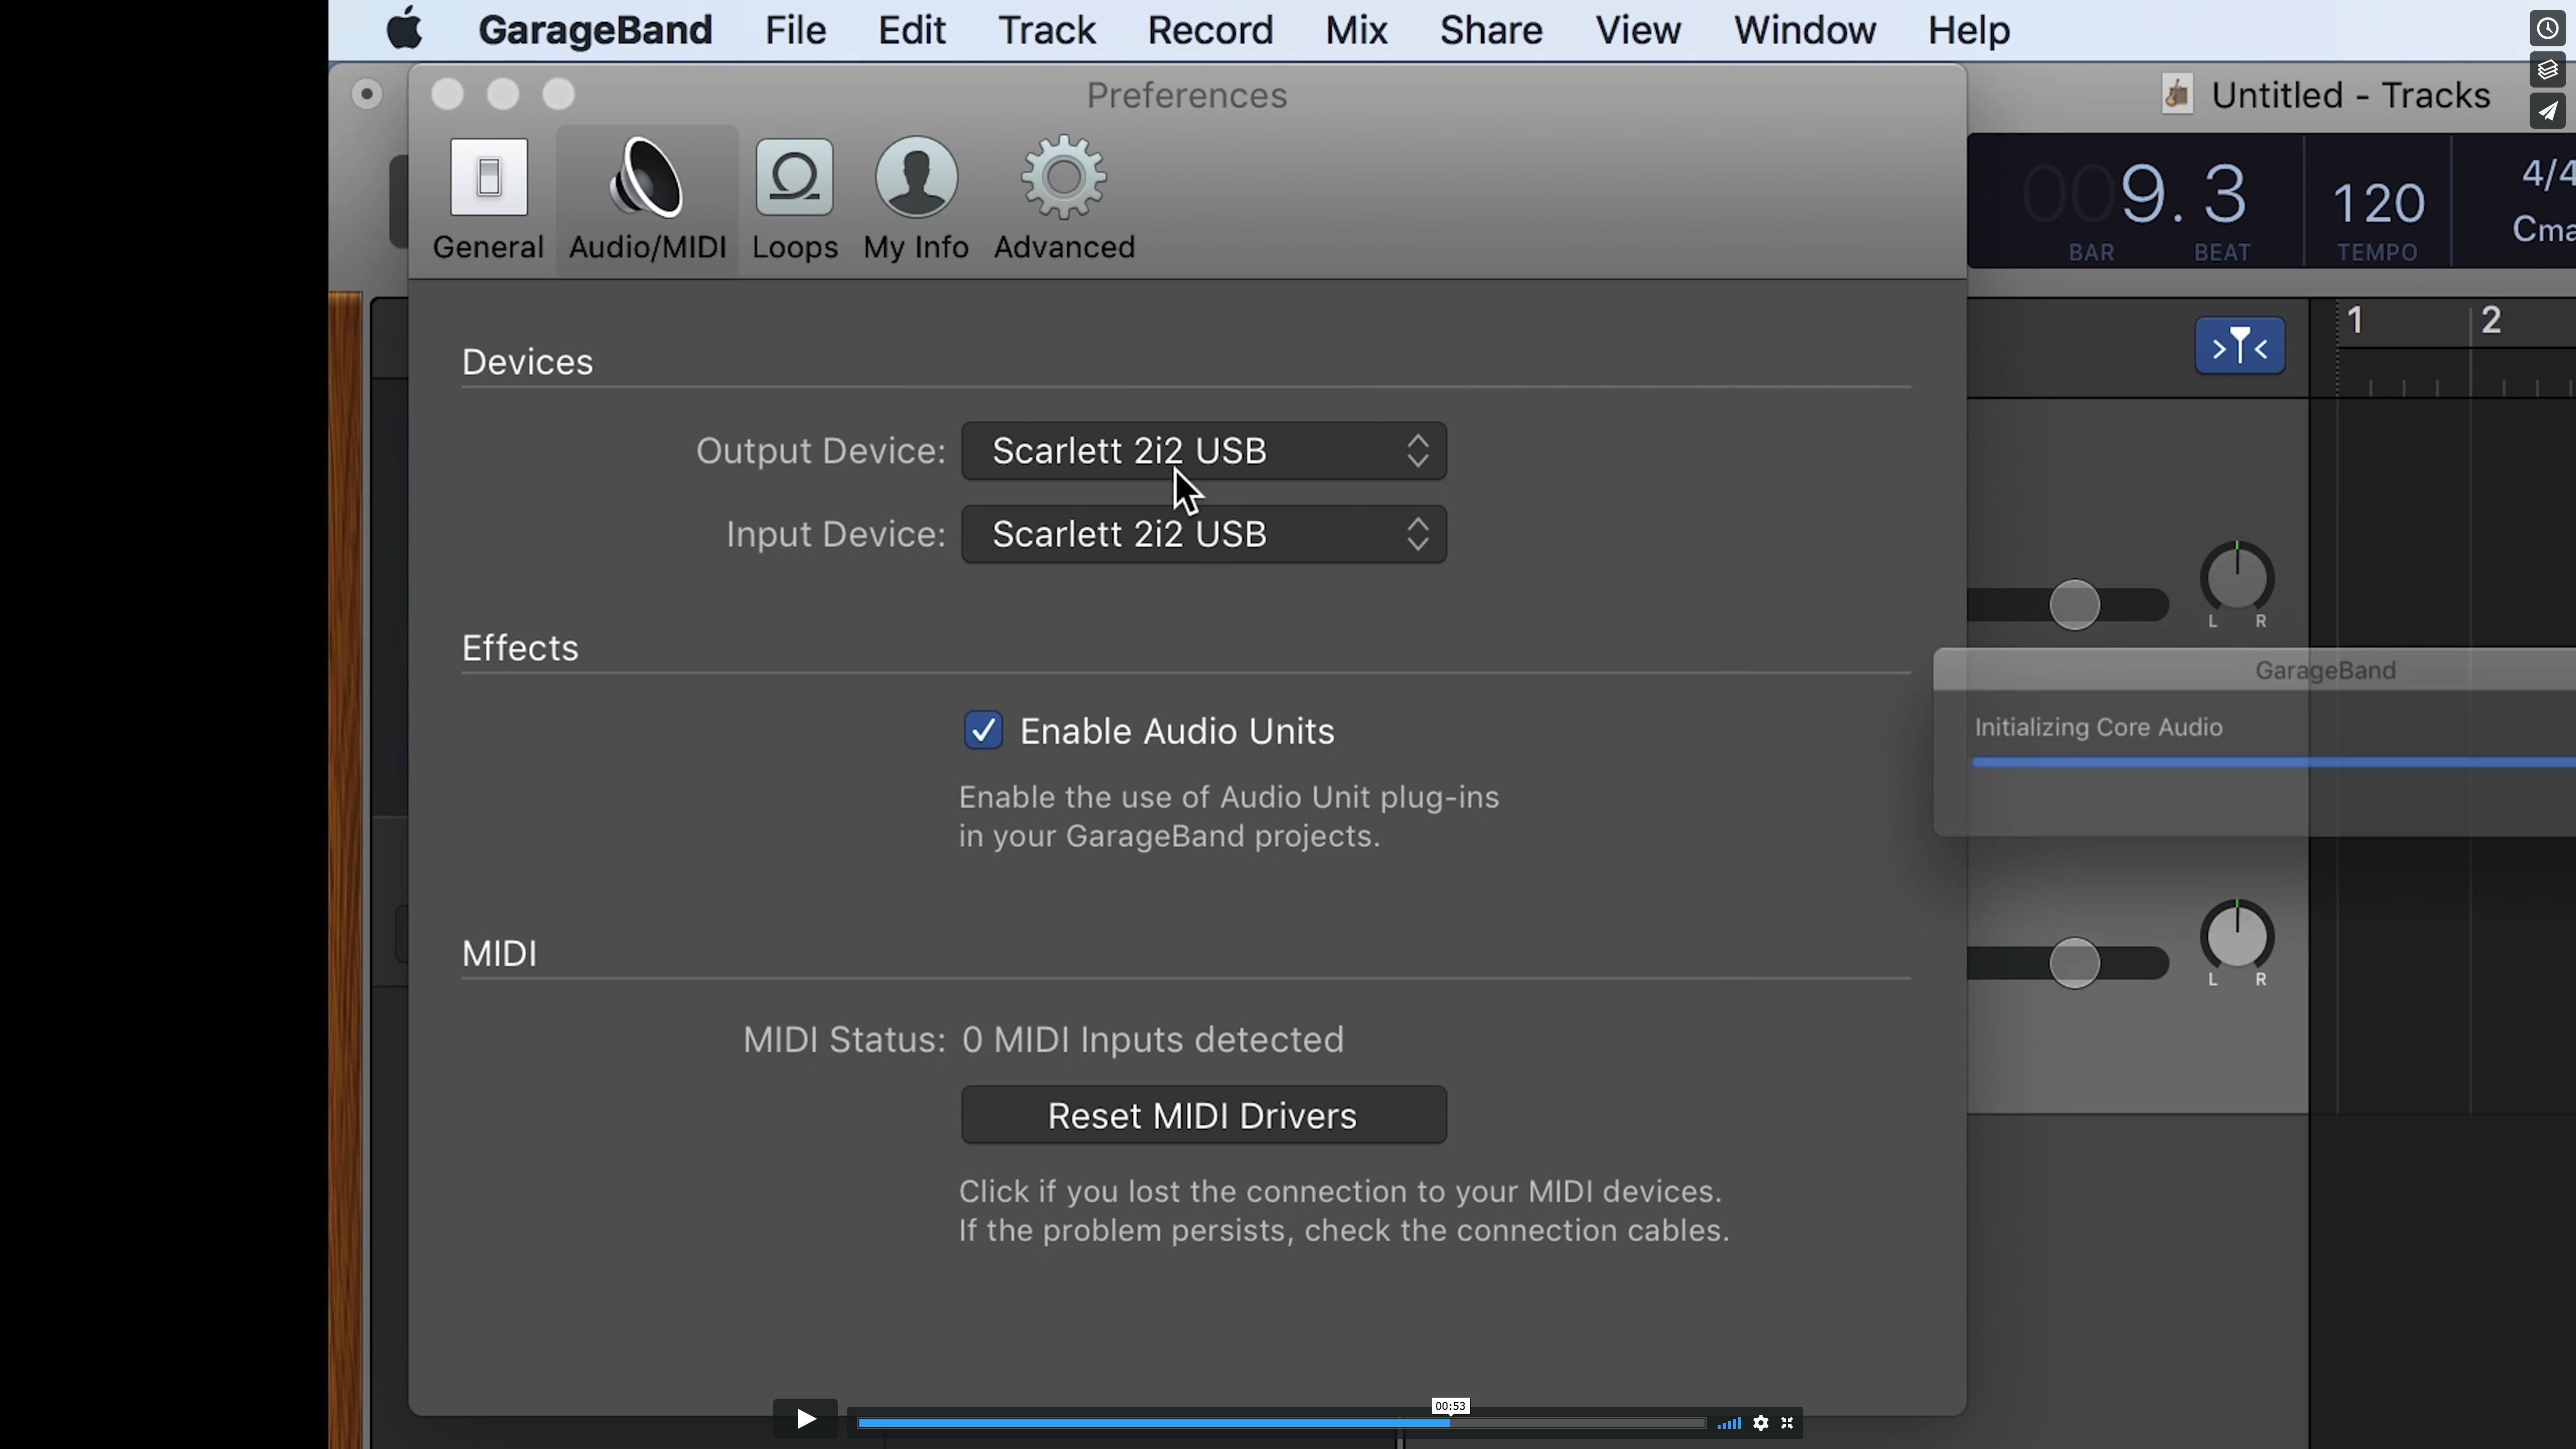 In your Digital Audio Workstation, make sure your interface or mixer is your audio input and output device. This ensures that your DAW program is using the interface or mixer as it’s source for audio (and not something else like the built-in microphone on your computer). This can usually be found in the audio preferences settings
Create
In your Digital Audio Workstation, make sure your interface or mixer is your audio input and output device. This ensures that your DAW program is using the interface or mixer as it’s source for audio (and not something else like the built-in microphone on your computer). This can usually be found in the audio preferences settings
Create
“Tracks” and “Record Enable”
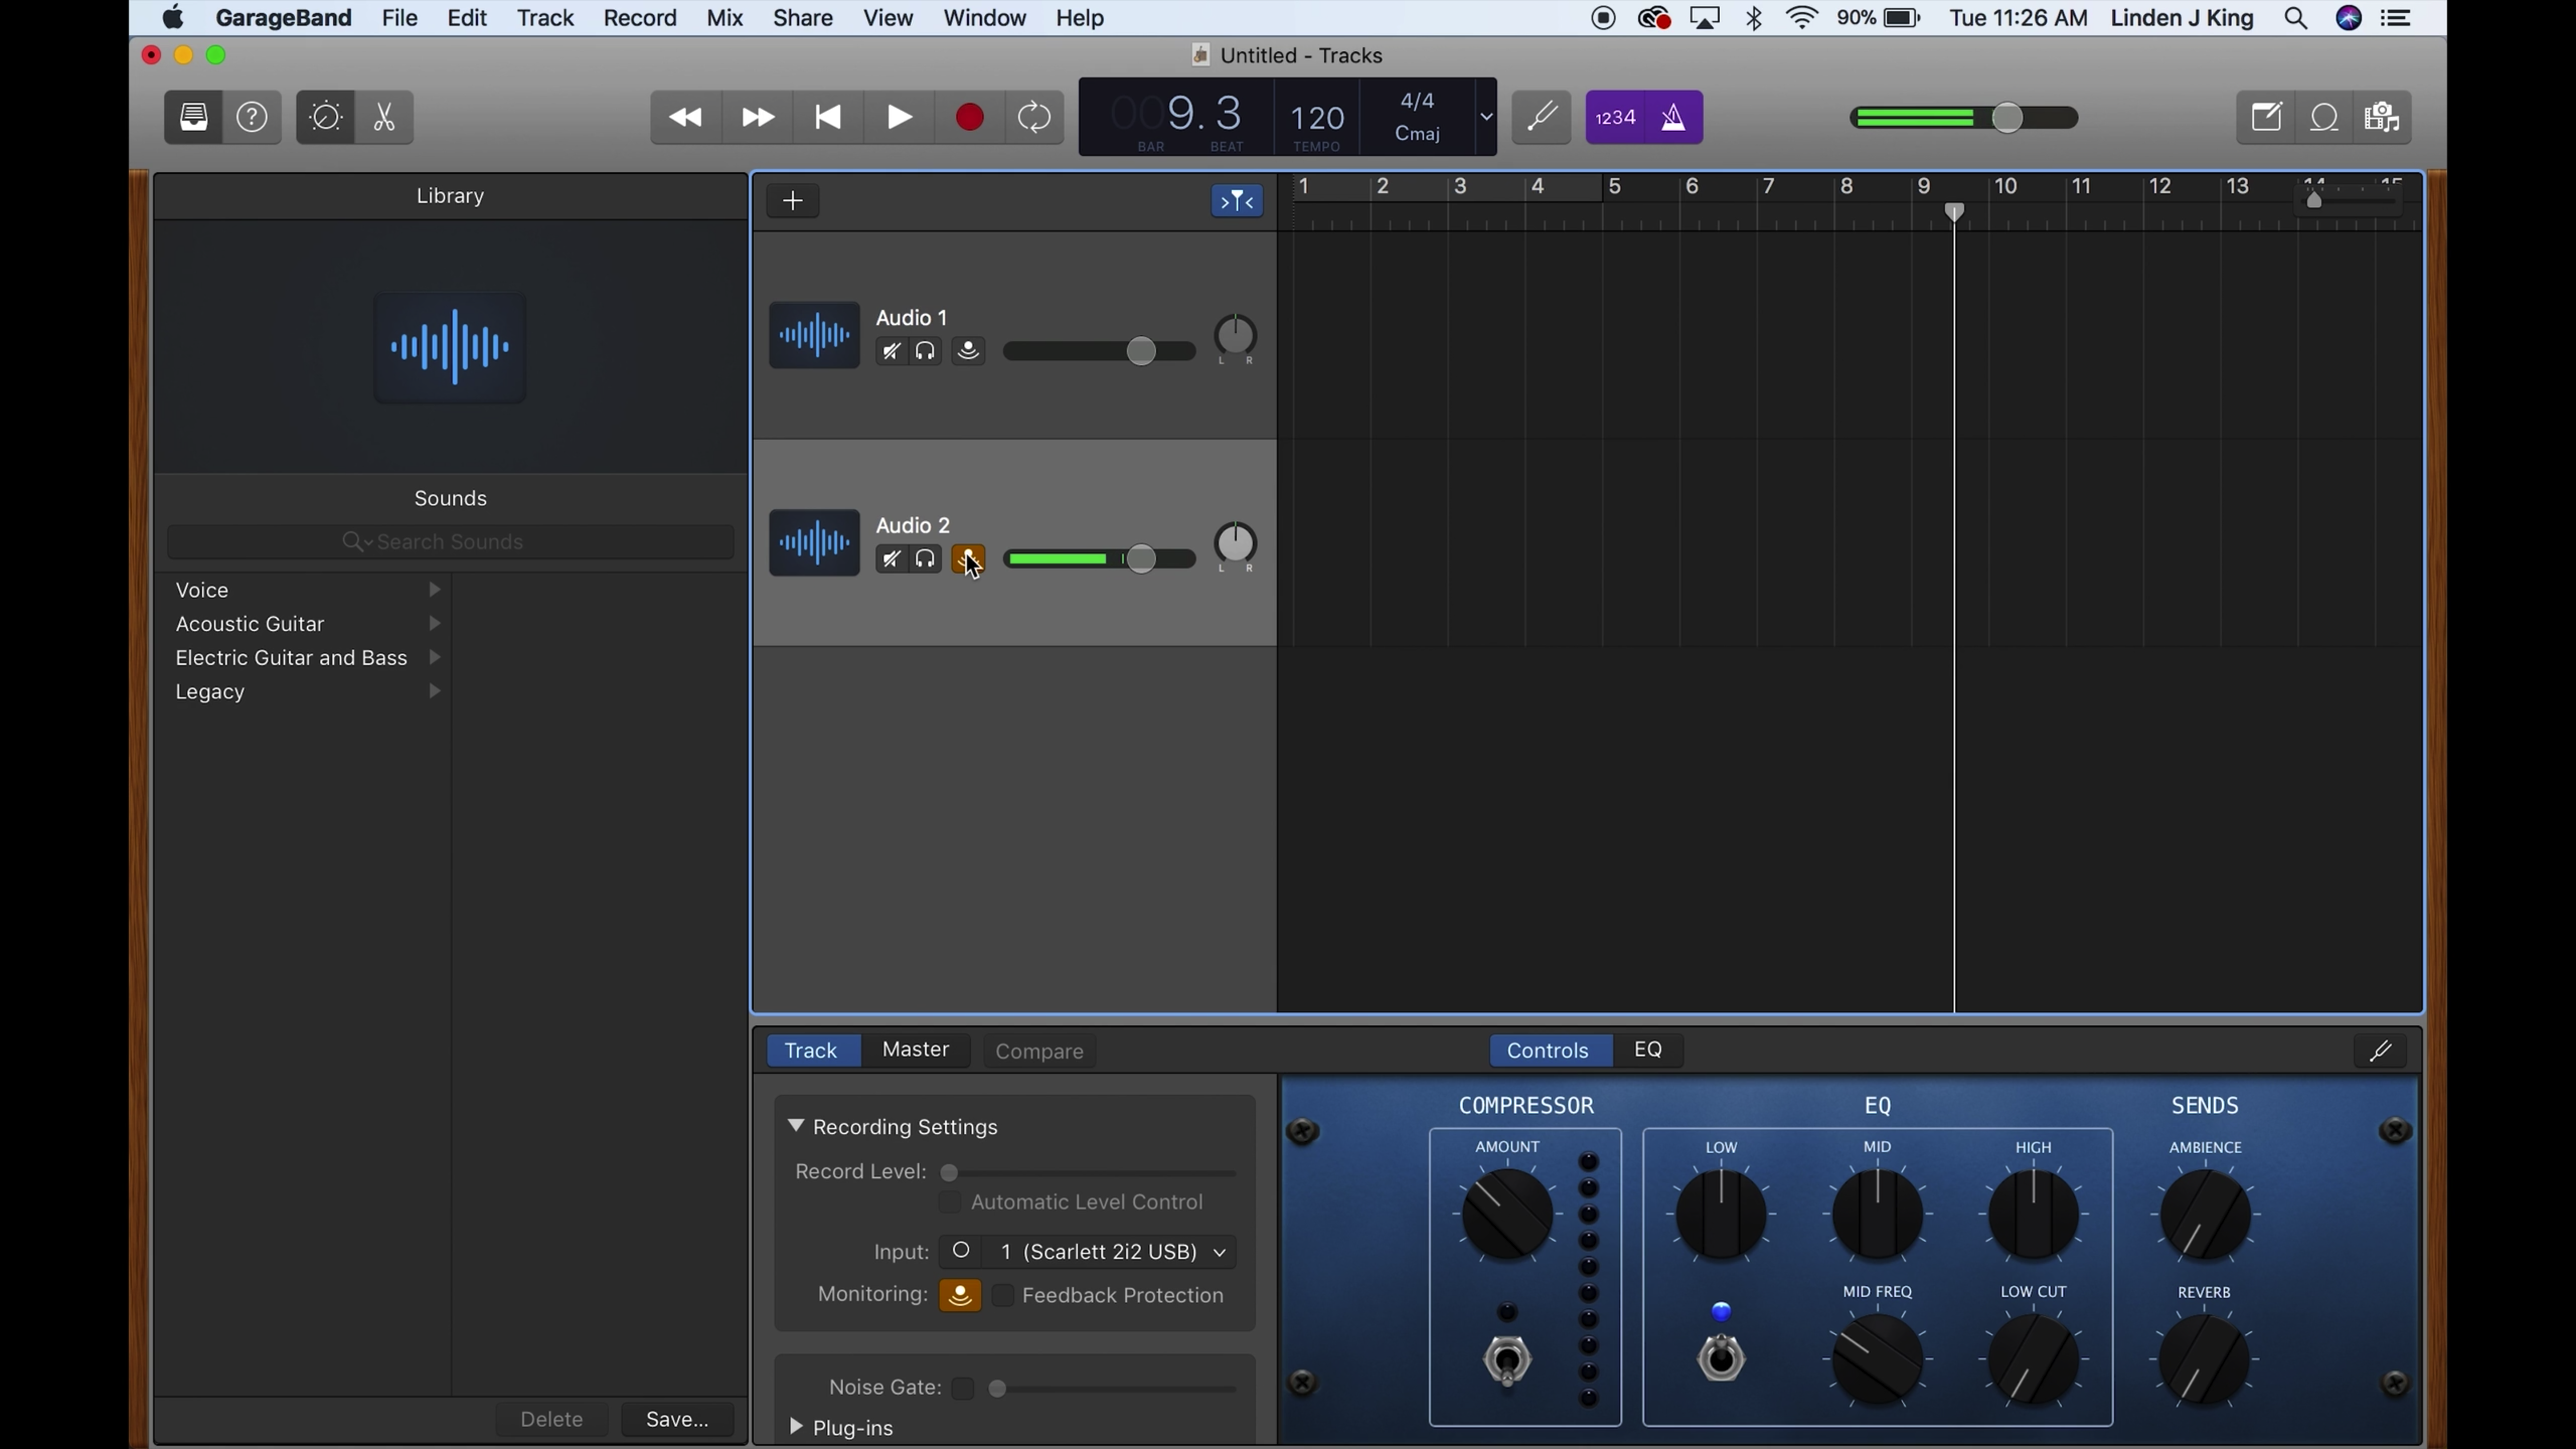 In order to actually start recording, you’ll need to create “tracks” for the audio to be recorded on it. Think of it like needing a piece of paper for you to write on. The track is what you record the physical audio onto, in the same way a piece of paper is what you physically write on. “Record Enable” simply means turning on the record feature so that the track is able to receive audio onto it. It’s usually indicated by a red circle record enable button. When you click it, it should flash, meaning it’s ready to be recorded.
Record!
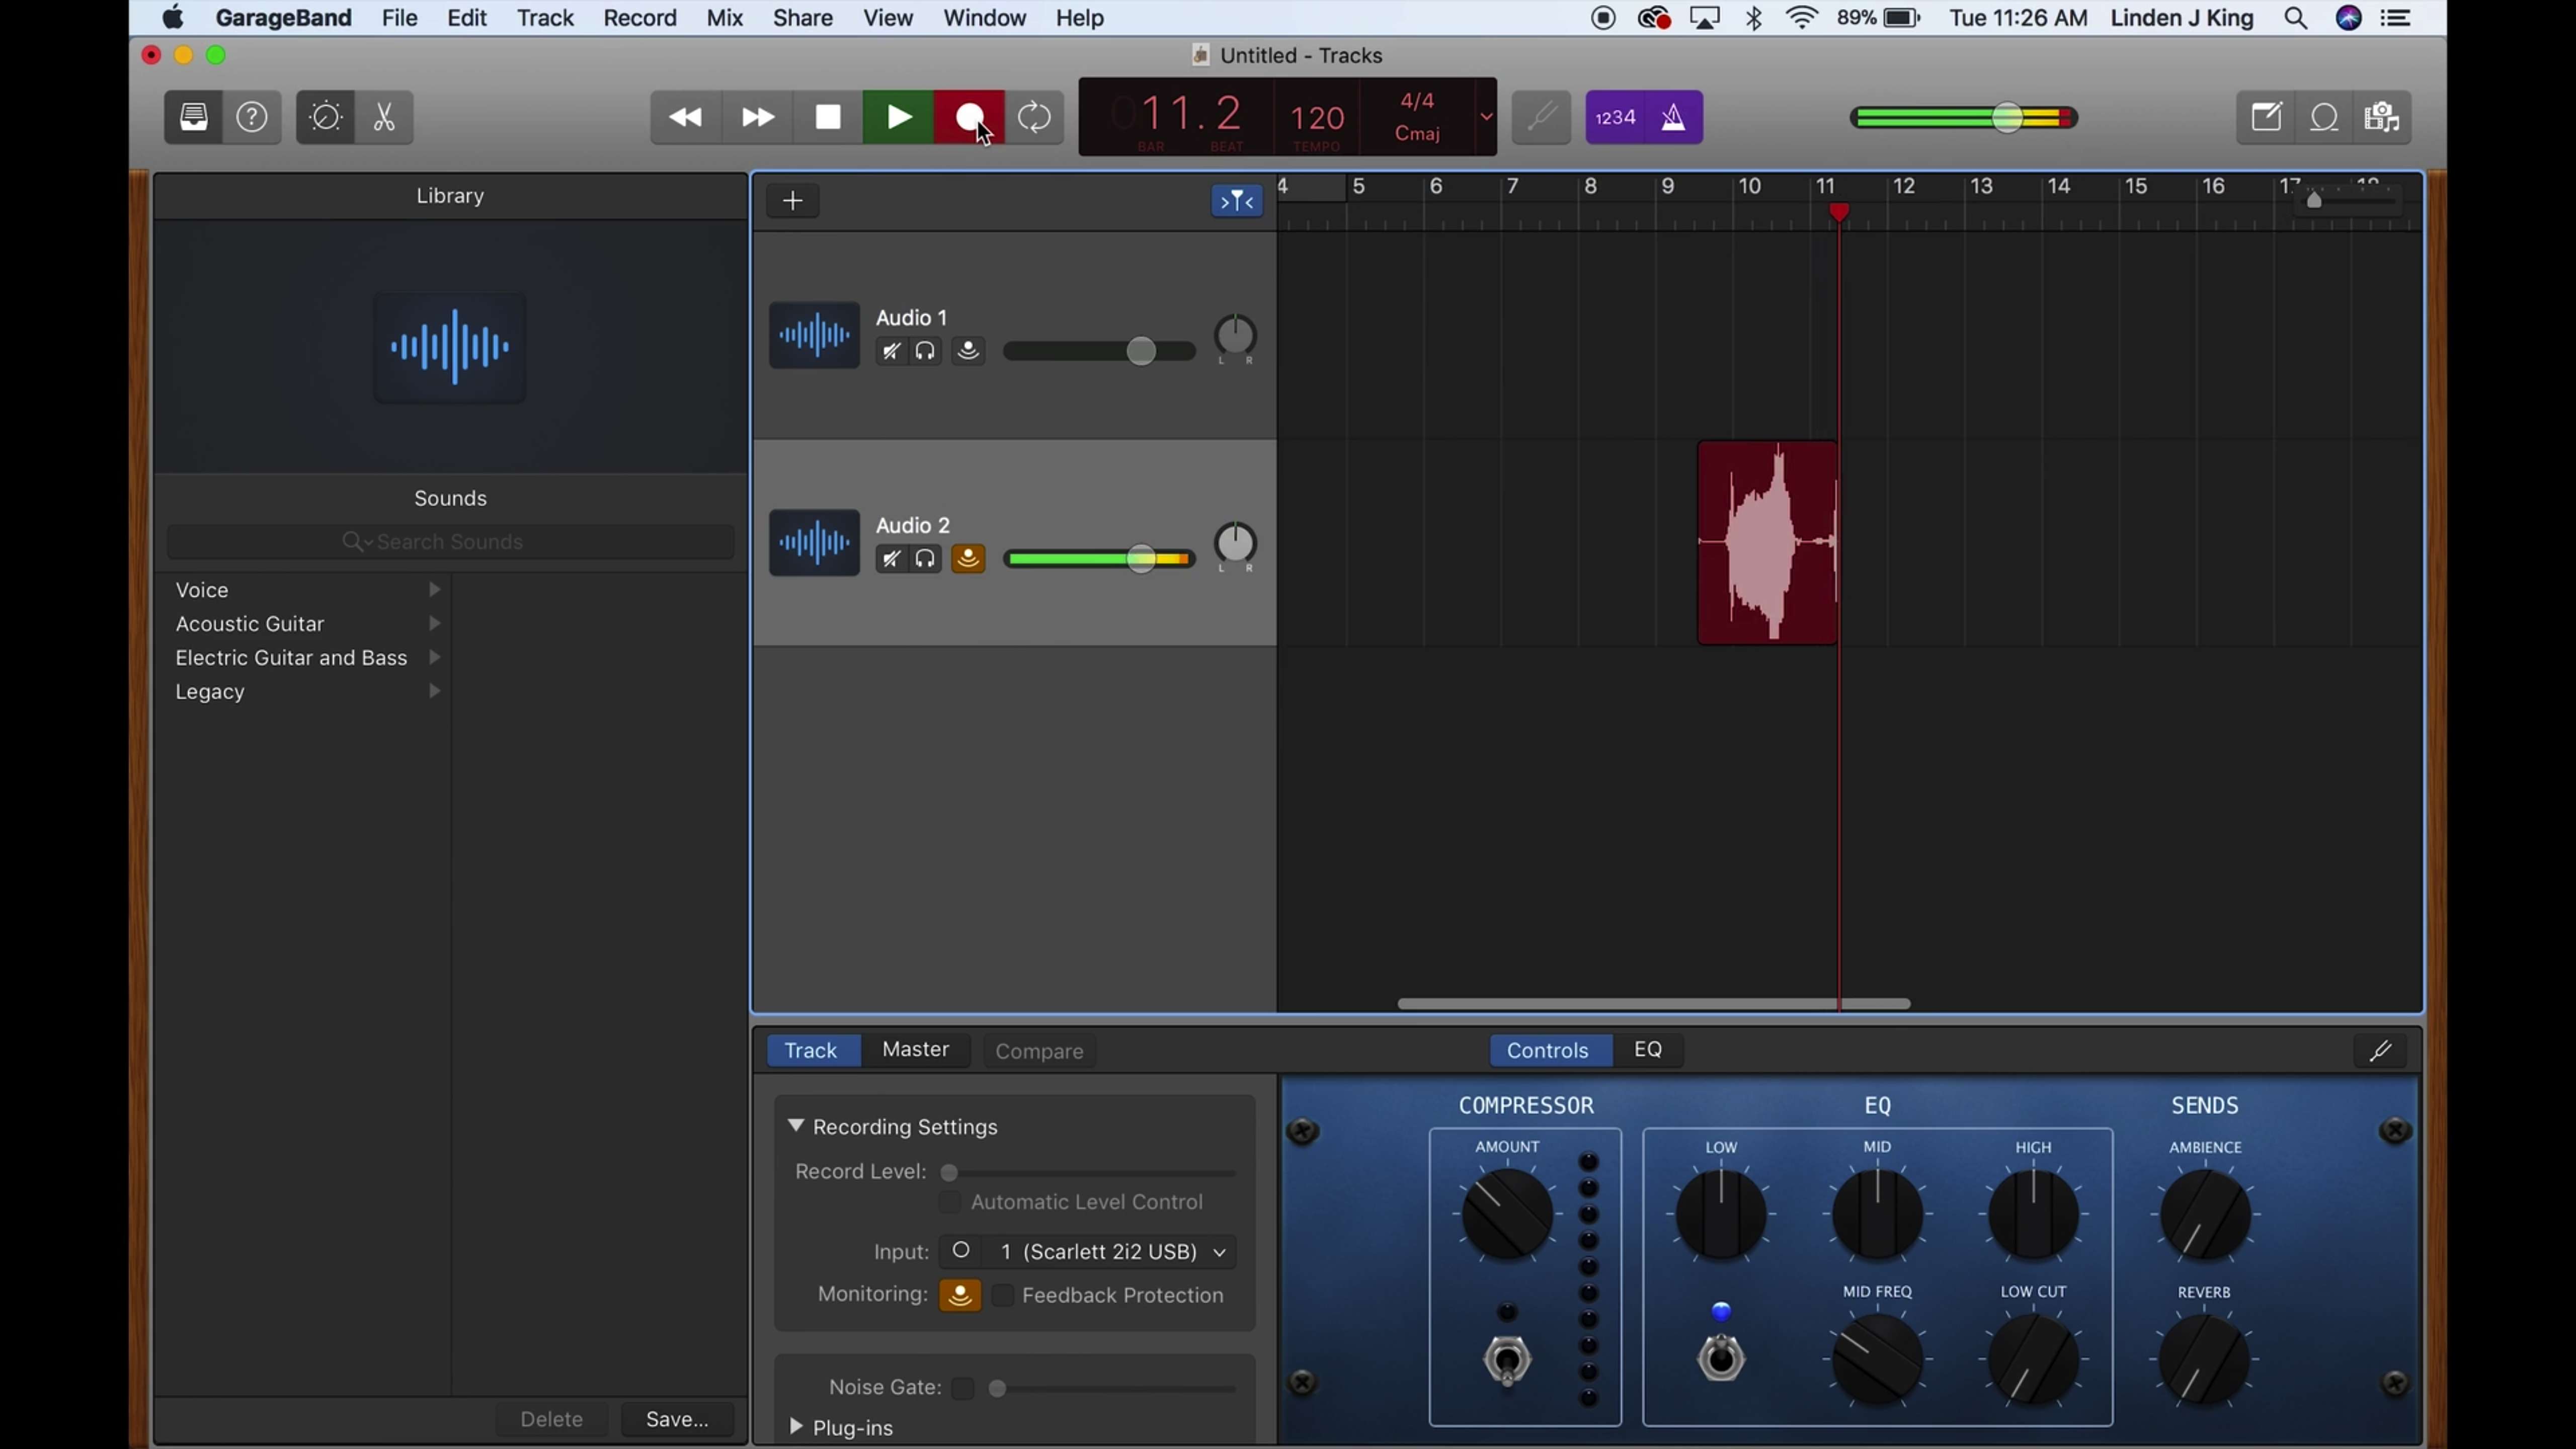 Once you hit record, the flashing red circle button thingy should become solid, the playhead should start moving and you should start seeing audio being recorded onto the track.
Things to Consider
There are a few things that need to be addressed when selecting the gear for your podcast. These things can really dictate how well your gear performs in various recording scenarios; the last thing you want is spending hundreds of dollars on gear only to find out that it makes your podcast sound... not so great.
Dynamic or Condenser Microphone? What’s the difference?

Microphones come in all shapes and sizes.
A dynamic microphone is a relatively simple and easy choice, you plug it into your interface or mixer and you’re pretty much ready to go. They’re durable, last long and can handle a beating so best to use these noisier environments and mobile podcasting. But do not capture as much sonic quality as a condenser would.
A Condenser microphone is much more sensitive than a dynamic, and can’t be tossed around as easily because they’re more fragile. But they can capture amazing detail in your voice; it’s best to use these in a more controlled environment without a lot of background noise (A/C, children, dogs, airplanes, cars driving by, etc.) A good thing to use to help block out noise is a microphone shield.
Where are you recording?
Are you recording in your home office? Outdoors in a noisy park? An acoustically treated recording studio? If you’ll be traveling a lot, make sure you have a reliable laptop that can travel with you. Also consider having a portable handheld recorder like a Zoom or Tascam. These are good to have in case your tech decided not to function, and some of them are good enough to use in general! Of course, with these, you’ll have to take the files and import them into a DAW if you want to edit the audio. Audio editing is a whole other beast that we will cover in a later post, but for podcasting it's relatively simple.
There you have it! You have just learned how to set up a podcast for recording! Of course this is just a crash course and there are many more intricacies of not only recording a podcast, but recording audio in general (it’s essentially the same thing). Thanks for reading and be sure to stay tuned for more installments of Rockville University!
HTML Comment Box is loading comments...
/* */